Setup & Settings
Button Layout & Settings
Copy-paste ready customization for immediate play
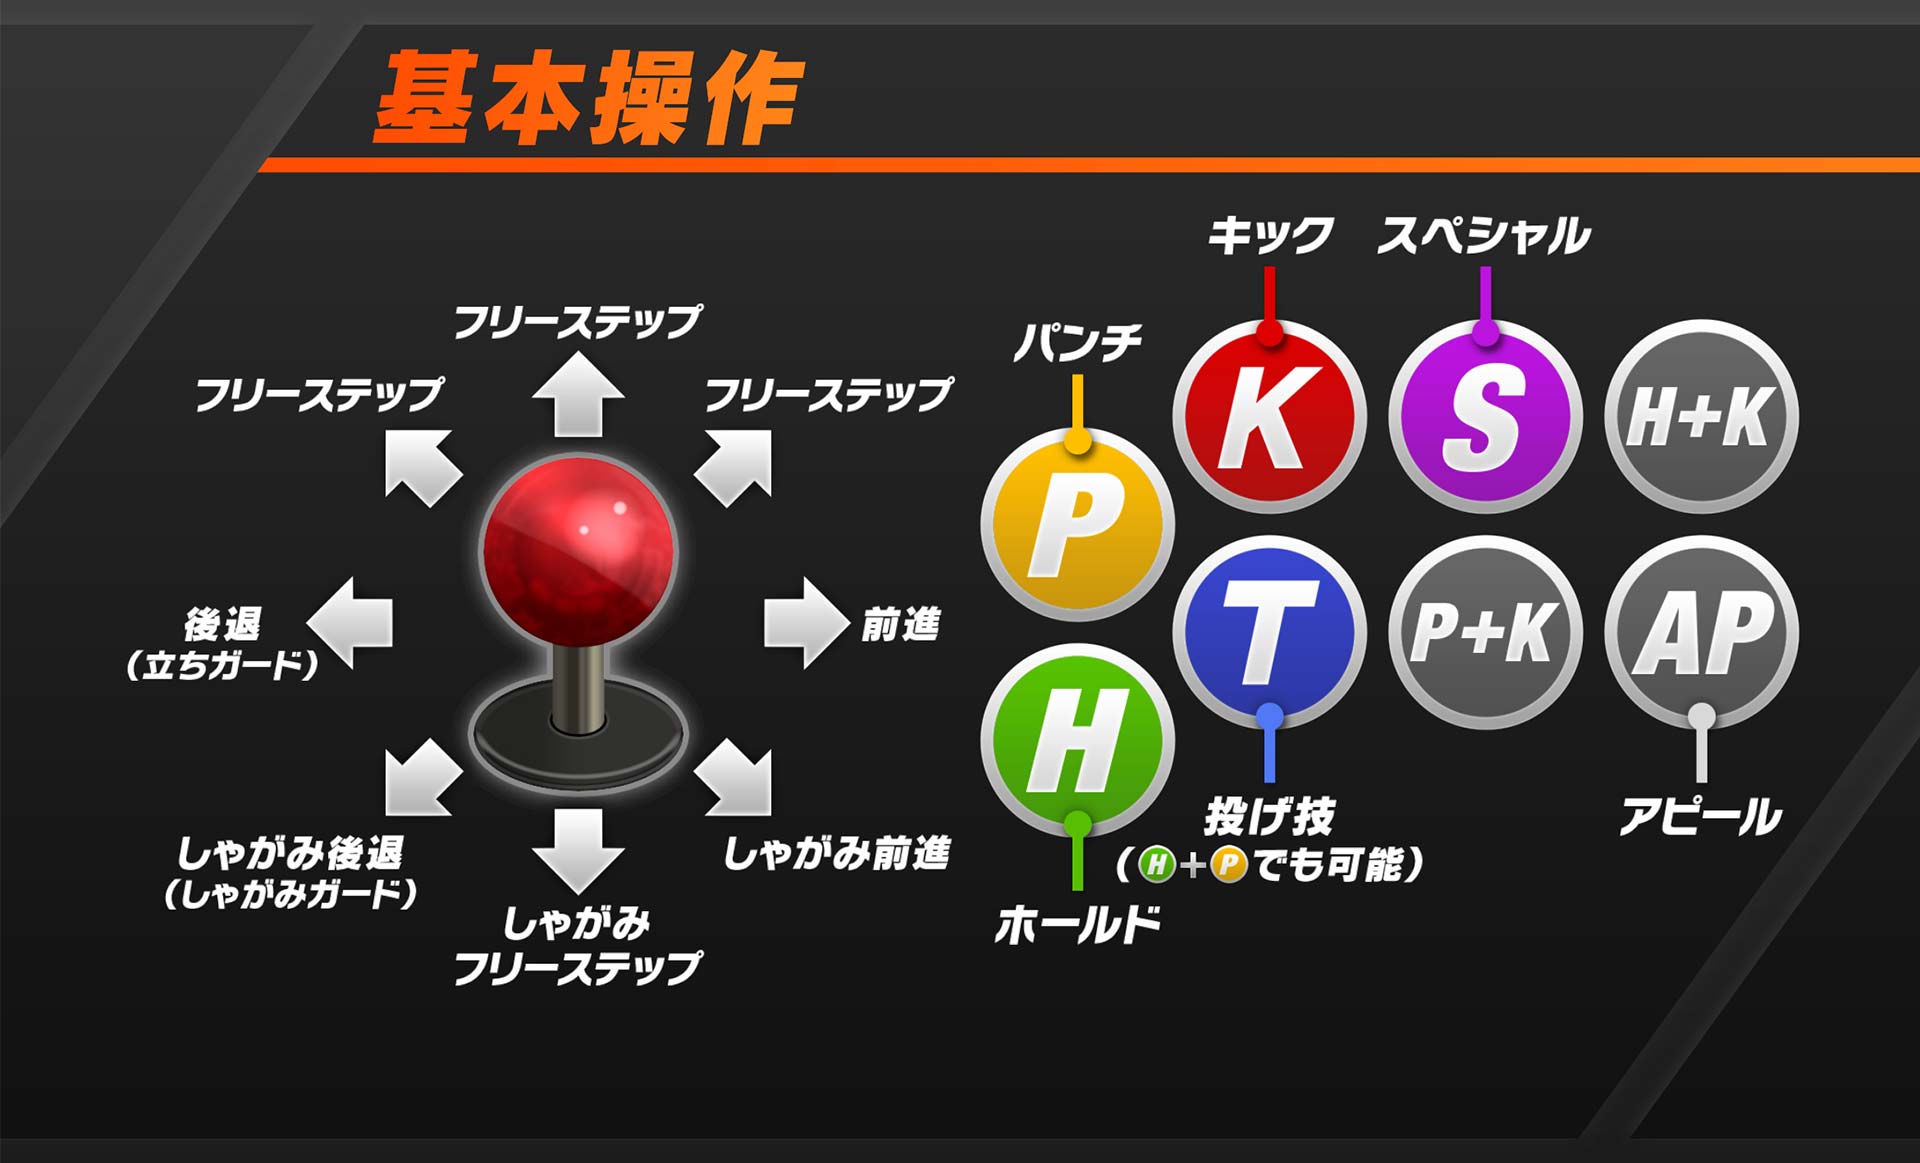
There's no single "correct" button layout in DOA6. However, mapping simultaneous inputs to single buttons alone dramatically reduces input errors. Just changing this is enough to start.

* Images from DOA6 official web manual
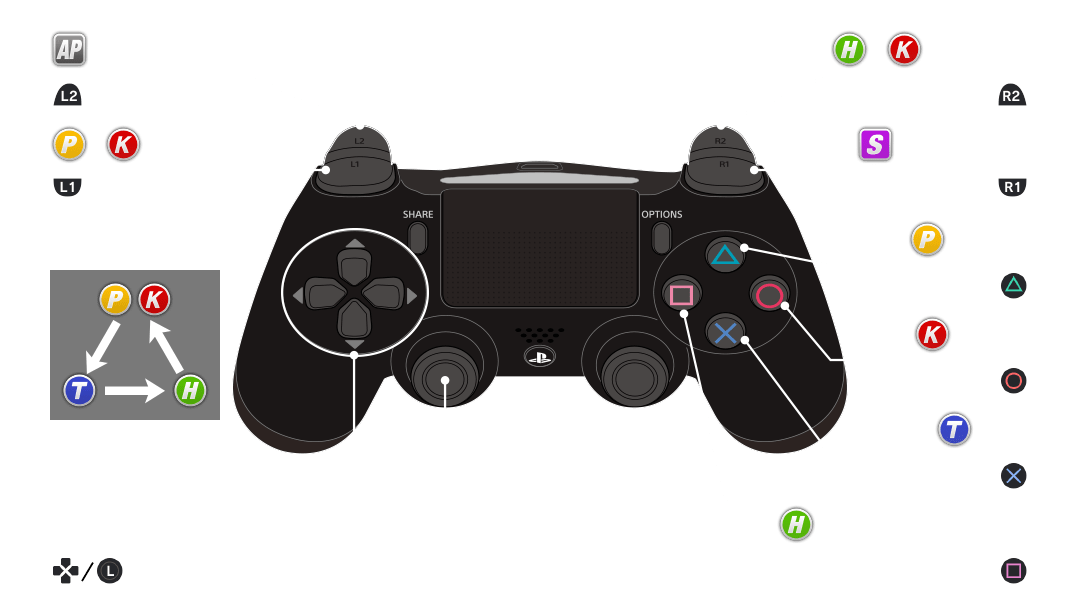
H (Hold/Guard) is assigned to □ — check if it's comfortable to press
By default, □ is H (Hold/Guard). H is the most-used button in DOA6 — it handles guarding, holding, and input cancels. Check that you can press it quickly while holding △ (P) or ○ (K). If it feels awkward, consider remapping it.
Remap APL (L2) to "H (Hold/Guard)" or similar
The default L2 is APL (Appeal) — a pose button that's completely useless in real matches. Mapping H (Hold/Guard) here lets you press L2 with your ring finger while using other buttons freely, significantly improving input comfort.
L1 (P+K) and R2 (H+K) can stay as default
L1 (P+K strong punch) and R2 (H+K strong kick) are already mapped as macros. Since they execute simultaneous inputs reliably, the defaults work fine.
PS4 Default Layout & Recommended Changes (Pad)
COPY & USE| Button (PS4) | Default | Recommended | Reason |
|---|---|---|---|
| △ | P (Punch) | Keep as-is | No change needed |
| ○ | K (Kick) | Keep as-is | No change needed |
| × | T (Throw) | Keep as-is | No change needed |
| □ | H (Hold/Guard) | Keep as-is | Most important button — no change needed |
| R1 | S (Special) | Keep as-is | No change needed |
| L1 | P+K (Strong Punch) | Keep as-is | Already macro-mapped — use it |
| R2 | H+K (Strong Kick) | Keep as-is | Already macro-mapped — use it |
| L2 | APL (Appeal) | H (Hold/Guard) | ★ Top priority remap. Allows striking while continuing to hold guard. |
Pressing □ (H) + R2 (H+K macro) outputs only K
When holding H (Hold/Guard) and pressing R2 (H+K macro) or similar H-inclusive macro buttons, H is already registered as ON, so only K outputs. S is also H+P+K, so be careful.
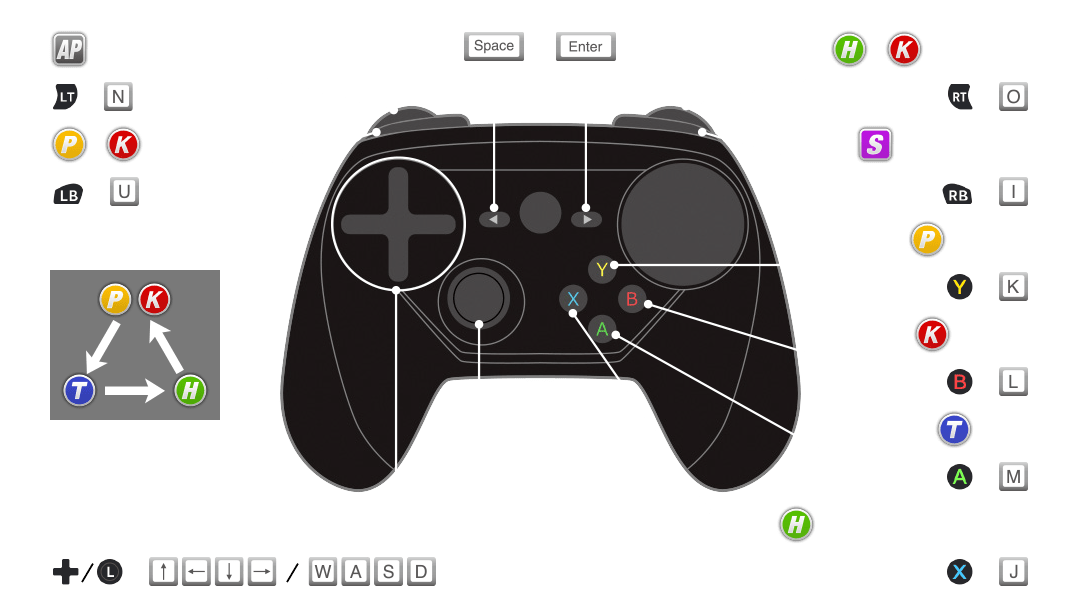
Arcade sticks have 6–8 buttons, so you can create layouts where simultaneous presses are done with natural finger placement. Manual pressing is more common than macros. This section is mainly for pad players — arcade stick users can take it as reference.
Triangle System Basics
Without this, the game will always feel like random button-mashing
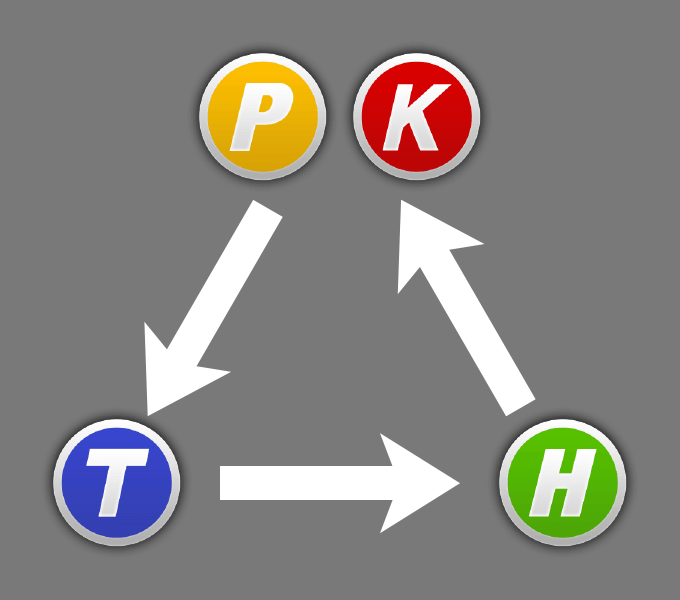
DOA6 matches run on the Strike/Throw/Hold triangle. Like rock-paper-scissors, correctly reading the opponent's action triggers Hi-Counter (1.5× damage).
* Images from DOA6 official web manual
A strike landing the moment the opponent enters a throw motion becomes Hi-Counter. Layering a strike before the throw animation completes wins cleanly.
If the opponent is attempting a Hold, throws connect. It's the primary tool to break through defensive opponents, and results in a Hi-Counter throw.
Input the directional Hold matching the opponent's strike attribute (High, Mid P, Mid K, Low) to counter. Timing it later yields Counter or Hi-Counter for more damage.
"Hi-Counter" — Triggered by Winning the Triangle
Correctly reading the triangle puts the opponent in Hi-Counter state, dealing 1.5× damage. Combos matter, but landing Hi-Counters consistently is equally important for win rate.
Holds split into Normal Counter and Hi-Counter based on timing. Closer to the impact = more damage, but also more risk. At first, just focus on landing the Hold successfully.
What to do in your first match
Just build the habit of guarding first. Most beginner-rank opponents are mashing — simply guarding exposes their recovery for you to punish.
When the opponent is clearly turtling and waiting out your strings, use a throw. Throwing unpredictably baits them into striking, creating Counter Hit opportunities.
Holds require different inputs for High, Mid P, Mid K, and Low — plus knowledge of attributes and a high risk of getting the wrong one. Build your game around strikes and throws first, then gradually add Holds as you get comfortable.
Setup and triangle done?
Next: Pick your character
If you haven't picked a character yet, head here.